Digital Hand Coloring a B&W Photo

Click image for larger view |
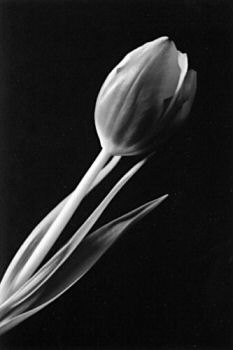 |
The first thing you need to do is make sure that you've got an acceptable B&W image. Regardless of whether you're starting from a scan from a B&W or from a color photo, you'll need to fix it up first. Open the image that you want to hand color. Image->Grey Scale. Image->Increase Color Depth->16 million. Adjust->Brightness and Contrast->Histogram Adjustment, set the Low and High Percentage values (bottom-most fields) to 0.001. You might want to save this as a preset as you'll find that you need it often. You can play with other fields in this dialog, bringing the Low and High Clip limits into line is the minimum you need to do. Adjust->Sharpness->Unsharp Mask, you can use the defaults, this is a little over-sharp for my tastes, try dragging the strength down to about 60. If there are a lot of very bright or very dark areas in the photo, you will undoubtedly have dust specks. Make selections around the worst of the areas. Adjust->Add/Remove Noise->Salt and Pepper Filter. Settings here will depend upon the size of your dust. Smaller areas of dust can be touched up with the clone tool. Also, the Scratch Remover tool is great for getting rid of errant pet hair that got on the scanner :-) The image should now be ready to hand color.
|
|
 |
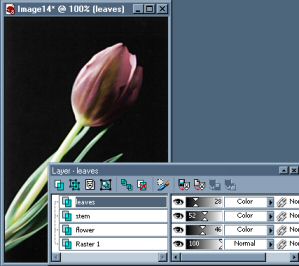
Add new layers for each color
Click on the New Raster Layer icon on the Layer Control Palette. When the dialog comes up, change the Blend Mode to Color and the Opacity to about 60%. You'll do this for each color/area that you want to have color.
|
|
 |
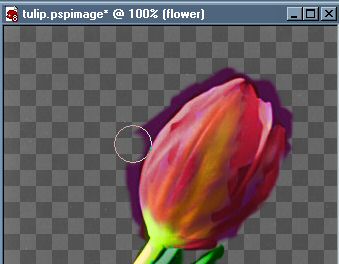
Begin to paint
Choose the color that you want to begin with. Use the Paintbrush on the new layer with this color. Don't worry about "going outside the lines", this can be cleaned up later. The color will look far too bright, don't worry about this either right now. You will probably want to use more than one color in certain spots since nothing in real life is a solid mass of color. Dab in other colors and use the Smudge, Push and/or Soften retouch tool to blend these colors. Keep adding new Color blend layers as you go along, a new layer for each portion of the object or where colors need to be kept apart from one another.
|
|
 |
Clean up the "outside the lines"
Promote the background to a layer by right clicking on it and choosing Promote to Layer. Drag the opacity on this layer down to around 60%. Turn the Opacity up to 100% on all the color layers, this will allow you to see better where you've gone "outside the lines". Changing layers as necessary, clean this up using a soft Eraser brush. Turn off the background layer completely by clicking on the Visiblity Toggle in the Layer Palette. Look for areas that you missed coloring in and touch these up.
|
|
 |
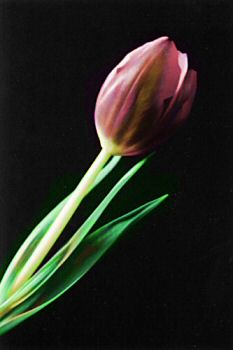
Turn the Opacity back up to 100% on the Background Layer. Bring the Opacity down on all of the color layers until the effect is what you want.
|
|