
Torn Paper
For this tutorial, you'll need to download Paint Engine You will also need a texture to use for the paper, I'll be using one of my own creation in this tutorial called Waffle, all my textures are free, so download it if you want. Okay...let's get started!
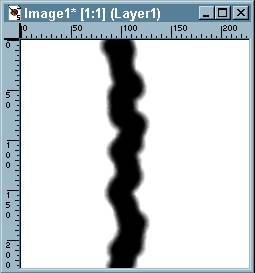
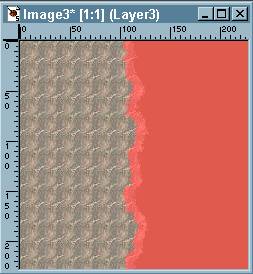
Start with a new image, we want it to be either the same size as the texture we're using or a multiple thereof. For example, the waffle texture I'm using is only 38x38, not nearly big enough to do anything with on it's own, so I'll make my new image six times larger, 228x228; this is going to save us the trouble of making the finished product seamless. Flood fill with white. Click on the paintbrush tool and set the options to Size=28, Hardness=50. Start at about 100 pixels across and draw a jiggly line down the image. When you get close to the bottom, check and make sure your line is going to end up at about 100 pixels across; again this saves the trouble of messing around with trying to make it seamless later.
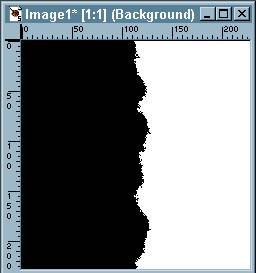
Flood fill the left side of the image with black, set the tolerance to about 185 to get good coverage. Now Image->Plugin Filters-> Fantastic Machines->Paint Engine, use the Bold preset. Color->Decrease Color Depth-2 Colors, check "grey values", "nearest color", and "weighted". Zoom in and clean up any "stray" black pixels, don't get too zealous or you'll lose the effect we're trying to create, just paint over the ones that are sitting all by themselves. Color->Increase Color Depth-16 Million.
Window->Duplicate, move the duplicate out of the way or minimize it, we'll be using it in a few minutes, go back to the first image.
Mask->New->From Image. Choose "this window", "source luminance", and leave Invert unchecked. Mask->Save to Alpha Channel (or to Disk), name it Wide, you can move this one out of the way or minimize.
Go to the second image, use the magic wand to select the white area. Selections->Modify->Expand by 8. Flood fill the selection with white (set the tolerance back up to 200). De-select. Image->Plugin Filters->Fantastic Machine->Paint Engine, use the bold preset again. Color->Decrease Color Depth-2 Colors. Clean up the "stray" pixels as before. Color->Increase Color Depth-16 Million.

Mask->New->From Image, use the same settings as before, except name this one Thin, you can minimize this now.
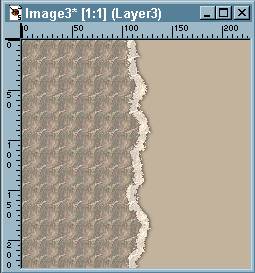
Make another new image, same size as your mask images. Open up the texture you will be using and use the eye drop tool to pick out a light color out of the texture to use as a background color. Flood fill with this color. Add a new layer. Mask->Load from Alpha Channel (or Disk), pick the Wide mask. Mask->Invert. You can view the mask if you want, Mask->View. Flood fill with your texture.
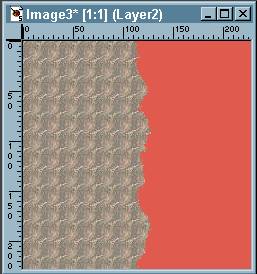
Mask->Delete. Colors->Adjust Brightness/Contrast, I set the brightness to 28 and contrast to 0 for this texture. If you're using a different texture, you may need to play around with these settings a bit. This layer is going to be the torn part of the paper, so you want to keep some color to it for it to look realistic.
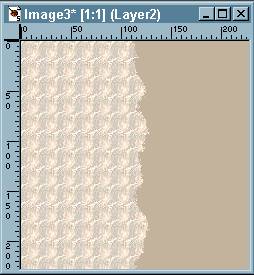
Add another new layer. Mask->Load from Alpha Channel (or Disk), pick the Thin mask. Mask->Invert. Flood fill with the texture.
Mask->Delete. Make Layer 2 active, use the magic wand to select the right hand side (the solid colored part). Selection->Invert.
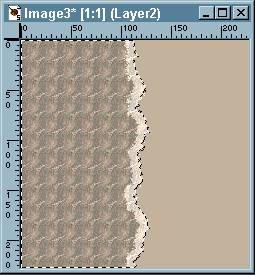
Image->Effects->Drop Shadow. Make it black, Opacity=60, Blur=5, Vertical=0, Horizontal=1. Make Layer 3 active, use the magic wand again to select the right hand side of the image, Selections->Invert. Image->Effects->Drop Shadow. Make it black, Opacity=45, Blur=1, Vertical=0, Horizontal=1.
To make it into a left edge border as shown on this page...Make a new image 1200x the height of your graphic. Flood fill with the same color that you used on Layer 1. Go back to the graphic, Edit->Copy Merged. Make the new graphic active, Edit->Paste as New Selection and line it up to 0,0.